
Dimraeth storage starts with the 18-slot chest in the guild hall, but the durable fix is a Pinewood Chest at the Sanctum. Complete the opening Sanctum chores until the Workbench and storage blueprints appear, obtain the first Pinewood Planks through exploration, build the Workbench, process Pine into more planks and Stone into Nails, then place a Pinewood Chest from the furniture storage section. Once several chests are working, keep one example item in the appropriate chest so the matching-deposit control can file later copies automatically.
The order matters because the Workbench solves the opening material loop. The Workbench needs processed components before it exists, yet it is also the station that makes those components repeatably afterward. Your first planks come from looting the world; later planks come from Pine at the bench. Build storage immediately after that bottleneck instead of spending the first processed materials on decoration.
Dimraeth storage progression at a glance
| Stage | Storage option | Best use | Main limitation |
|---|---|---|---|
| Early Earlwood | Guild-hall chest | Temporary overflow and first building materials | Recorded as only 18 slots |
| Opening Sanctum | Character inventory plus temporary chest trips | Carry the exact materials for the Workbench | Encumbrance and repeated travel |
| Workbench complete | Pinewood Chest in the Sanctum | Dedicated crafting, food, raw-material, or equipment storage | Requires blueprint state and processed components |
| Multiple chests | Matching-deposit organization | Move later copies to the chest that already contains that item | The chest needs a matching item to classify the deposit |
This is a progression path, not a requirement to keep every item. Storage works best when it reduces decisions. Salvage equipment that has no current build or set purpose, sell appropriate excess, and reserve chests for materials and gear you can explain.
Temporary guild-hall chest
The guild hall contains a chest recorded with 18 slots. It is enough to protect the first useful materials while the Sanctum is still being established, but it fills quickly when equipment sets, food, crafting parts, spell-related items, and building materials arrive together.
Use this chest deliberately. Put the first Pinewood Planks, Nails, Stone, Pine, and other known construction components where you can retrieve them for the Workbench trip. Keep equipment only when it supports an active set, an immediate comparison, or a planned build. If a piece has no purpose, the blacksmith's dismantling option can convert unwanted gear into upgrade materials.
Do not carry the entire chest back to the Sanctum in one trip. One player hits the weight cap while moving construction materials and has to return some items. Read the current Workbench requirements, take those materials, build the station, and then come back for the next structure.
The guild-hall chest is a bridge, not a failed version of the final system. Once Sanctum storage is available, leaving rarely used construction items in town makes routine crafting slower. Move the working stock to the base in controlled loads.
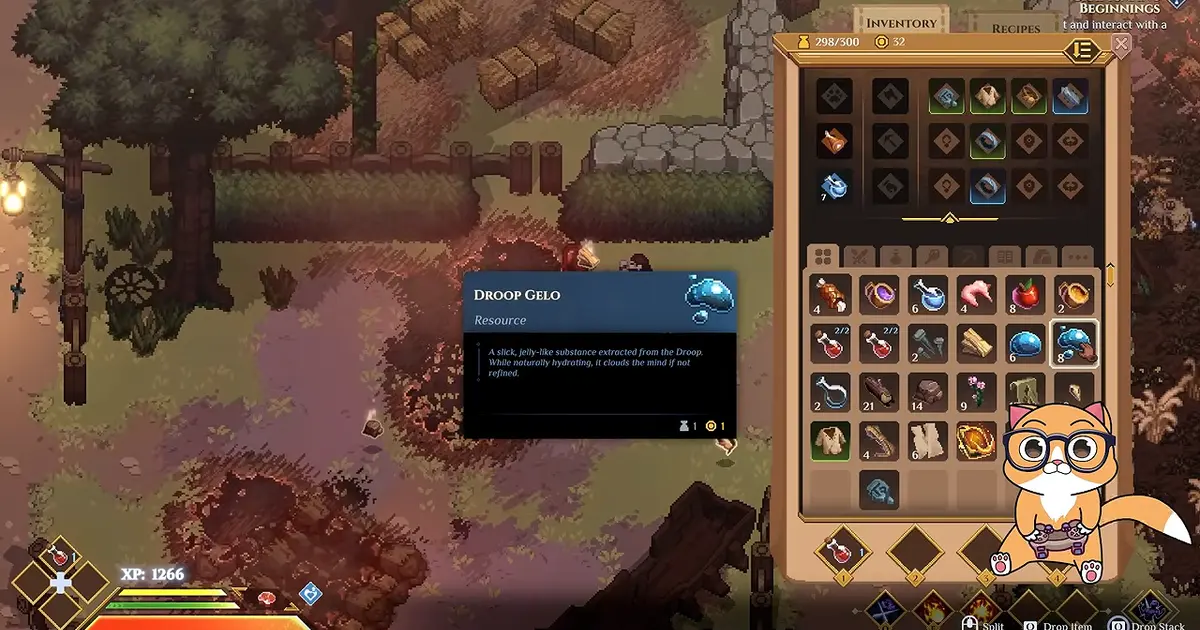
The recorded inventory is close to its weight limit, illustrating why construction materials should move in planned loads.
Storage blueprint and opening Sanctum chores
The reproduced Early Access route begins after the Lost Caverns and its slime encounter. At the future Sanctum, the mage NPC asks the player to dismantle wreckage. The sequence then has the player build a tent and campfire and prepare food and water. Completing that opening work exposes blueprints that include the Workbench, Alchemy Table, and storage chest.
Treat every action as a separate objective. Placing a tent is not the same as completing the campfire interaction. Cooking one requested item is not proof that the full opening task advanced. When a blueprint is missing, reopen the active objective and compare it with what was actually built and used.
After the opening chores, speak with the mage near the Sanctum Waygate again. The documented route then opens travel to Earlwood, where guild-hall conversations and board work move the larger progression forward. That travel access is useful because the first processed materials may already be in the town chest.
If the Pinewood Chest does not appear in the building menu, check blueprint progression before searching for a random recipe scroll. One community report built a Workbench yet still could not see the chest craft, showing that owning the station alone is not enough evidence that the storage category has been unlocked.
First Pinewood Planks before the Workbench
The first Workbench needs Pinewood Planks even though it later becomes the station that makes more. Obtain the bootstrap planks through exploration, then trust the live Workbench and Pinewood Chest requirements if Early Access numbers change.
Use the dedicated Dimraeth Pinewood Planks route for the Farmland search and processing sequence. For storage setup, the important transition is simpler: build the Workbench, process only the components shown by the current chest recipe, then place the chest near the stations it supports without blocking their interaction areas.
The Dimraeth recipes guide explains why raw and processed materials are different requirements. A bag full of Pine does not satisfy a line that specifically asks for Pinewood Planks.
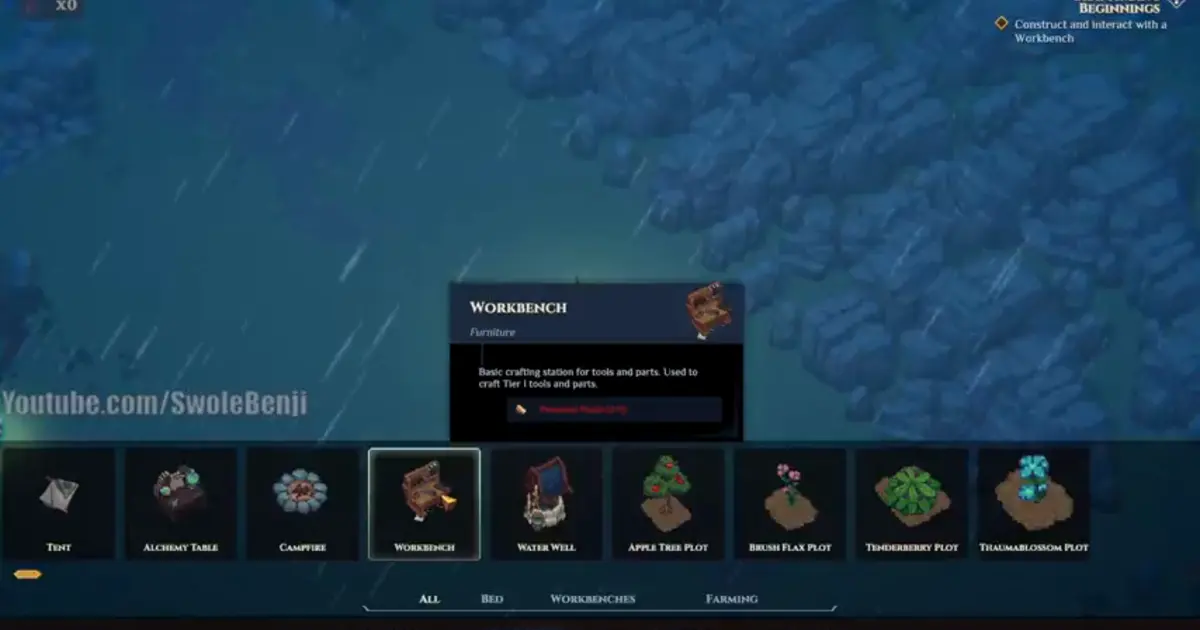
The Workbench entry exposes the first-plank bottleneck directly in the build menu.
First Pinewood Chest placement
Place the first chest where it shortens the base loop: close enough to the Workbench and other practical stations that depositing and retrieving materials takes little time, but not so close that selecting one object repeatedly targets another. A recorded builder leaves space between workstations for exactly that interaction reason.
Do not wait for a finished house. Base building is optional and the useful early setup can be a cluster of chests and crafting tables. The storage problem is solved by access and organization, not walls or flooring.
Once the first chest exists, move only one category into it and verify the interaction. A simple opening arrangement is crafting inputs, food and consumables, and equipment or set pieces. Three chests are a player recommendation from the documented route, not a requirement. Add another only when a category can no longer be found quickly.
The Dimraeth base-building guide covers the wider Workbench, utility, station, farm, and facility order. Storage comes early because every later project creates more inputs and outputs to manage.
Matching deposit and quick storage
The Early Access build includes a control that deposits matching items into storage. Mudtek confirmed the requested quality-of-life feature was already in the game, and recorded gameplay demonstrates it with materials, consumables, and set pieces.
The important condition is classification by an item already present in the chest. If one piece from a particular set is stored there, the matching action can recognize later pieces from that set. The same principle makes a material chest useful: seed it with the material categories you want it to receive.
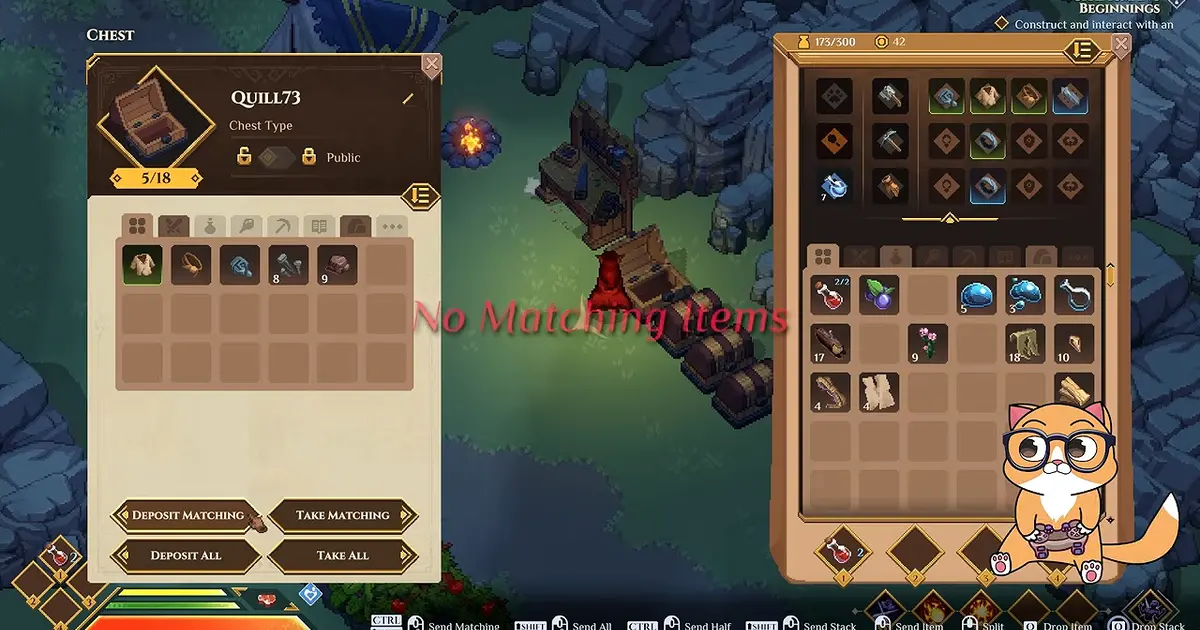
The chest interface exposes Deposit Matching and Take Matching as explicit storage controls.
This feature does not replace an organization plan. It accelerates a plan that already exists. An empty chest has no examples to match, and a chest containing unrelated categories can absorb a mixture that is hard to browse later.
A recorded keyboard-and-mouse run also demonstrates a Shift and double-left-click storage shortcut. Control bindings and controller behaviour can change, so read the current prompt rather than treating that exact input as universal. The supported concept is rapid transfer and matching deposit, not one permanent key combination.
When quick deposit appears to miss an item, check:
- whether the destination chest already contains that exact item or matching set family;
- whether the item is locked, equipped, or otherwise unavailable for transfer;
- whether the correct chest is open or inside the matching-deposit range;
- whether the control prompt differs for keyboard, mouse, or controller;
- whether the item belongs to a category you intentionally keep elsewhere.
A practical sorting system
Sort by the next action, not by an elaborate taxonomy. The following structure matches the verified progression loop and stays understandable when more systems open.
Crafting inputs
Keep raw resources and processed components needed by nearby stations together. Pine, Pinewood Planks, Stone, Nails, and other building inputs belong where the Workbench loop can use them. Preserve unknown ingredients that the Crafting Codex connects to undiscovered recipes until their use is understood.
Food and preparation
Keep ingredients, cooked food, water, and relevant consumables close to the stations that produce them. The purpose is to prepare a trip without searching equipment chests. Do not mix every unknown monster part into food simply because both are consumable-looking icons.
Equipment and set pieces
Store pieces by actual set or planned build. Matching deposit can place later copies with the seeded set. Before salvaging, compare whether the item maintains a two-piece, three-piece, or other visible set effect. The evidence supports set-based build choices but not a universal list of pieces worth keeping.
Spell and boss materials
Separate items tied to spellbooks, boss encounters, or upgrades from ordinary raw materials. A component that looks unused may be the missing input for a book. Inspect the relevant service or Codex before selling it.
Transfer and undecided items
Keep one small temporary chest for items that need a decision after the trip. Empty it regularly. A permanent “miscellaneous” chest becomes a delayed inventory problem and weakens matching deposit because it contains examples from too many categories.
Encumbrance and field decisions
Storage begins to matter before the inventory is visually full. A recorded character reaches maximum weight and can no longer pick up ordinary loot. If movement slows or pickup fails, check weight before changing controls or blaming the object.
Make one of four decisions in the field: use the item, discard or leave it, return to store it, or dismantle/sell it at the next appropriate service. Carrying every low-value item back is not automatically efficient, especially once the current build and next crafting goal are known.
The Dimraeth movement guide covers the relationship between carried weight and travel symptoms. Storage is the long-term fix; repeatedly forcing an overloaded trip is not.
For building runs, work backward from the structure. Take its exact components rather than every material that might be related. The Workbench can continue processing after a job is started in the documented route, so queue the needed components and use the waiting time for another short base task instead of loading the inventory again.
Storage troubleshooting
| Symptom | First check | Likely next action |
|---|---|---|
| No storage blueprint | Opening Sanctum objective, tent, campfire, food/water task, and follow-up dialogue | Complete the missing interaction rather than rebuilding the Workbench |
| Workbench cannot be built | Exact Pinewood Plank requirement and the town chest | Search highlighted world loot for the first processed planks |
| Chest requires missing Nails | Workbench processing list and available Stone | Craft Nails from Stone if the current recipe permits it |
| Inventory is full before storage opens | Guild-hall 18-slot chest and unwanted gear | Stash construction items and dismantle gear with no use |
| Matching deposit ignores an item | Seed item in the destination chest and current transfer prompt | Place one matching item manually, then retry |
| Crafting station cannot see a stored item | Where the recipe is counting materials | Carry the exact requirement to the interaction if needed |
| Chest selection is awkward | Spacing between placed objects | Move storage or stations to create a clear interaction gap |
The available documentation does not establish universal linked-storage range, ownership, or co-op permission rules. If a station fails to count an item in a chest, do not promise that every recipe can pull remotely. Compare carried and stored quantities and move the required amount into the inventory for a controlled retry.
Likewise, do not assume a co-op guest's personal organization persists identically across worlds. Building state belongs to the world in the recorded material, and hosted progression can differ. Keep important shared materials in the base where the current group can verify them.
Storage loop for each expedition
Use the same short loop after every trip:
- Deposit matching materials and set pieces into seeded chests.
- Read newly found ingredients before deciding they are junk.
- Dismantle equipment that serves no current or planned set purpose.
- Move the next craft's exact inputs beside the station that needs them.
- Restock food, water, potions, and other prepared combat items.
- Leave with enough free capacity for the target of the next route.
This loop keeps storage connected to action. Chests are not a museum for every drop; they are infrastructure for crafting, building, preparation, and build experiments.
Early Access evidence boundary
The 18-slot guild-hall chest, opening blueprint sequence, exploration-sourced first planks, Workbench processing, Pinewood Chest, Stone-to-Nails route, matching-deposit feature, and set-piece matching are supported by documented Early Access play or direct developer discussion.
Exact recipe quantities, key bindings, remote crafting access, co-op permissions, and the ideal number of chests are more version-dependent or only player recommendations. Check the live interface instead of treating them as permanent constants.
The shortest supported answer remains: use the town chest temporarily, unlock the opening Sanctum blueprints, build the Workbench with found planks, make repeatable components, and place a Pinewood Chest before decoration. That order turns storage from a recurring emergency into part of the preparation loop.