
Replay a defeated Dimraeth boss through its bounty on the Guild Hall quest board. The supported loop is: clear the boss once through normal progression, check the board's bounty entries, accept the repeat, and complete it at a difficulty your character can clear efficiently. Do not return to the original story arena and wait for a normal respawn when the bounty system is the intended repeat route.
The point of a replay is not merely to make the same health bar appear again. Bounties connect repeat encounters to scaling difficulty and rewards. That makes the right repeat depend on what you need next: a boss-specific material, progress toward a named equipment set, experience, a build test, or a cleaner practice run. Choose the reward first, then choose the bounty.
Dimraeth boss replay steps
- Defeat the boss once in normal story or world progression.
- Return to the Guild Hall and open its quest board.
- Select the bounties section and look for the defeated encounter.
- Read the displayed difficulty and potential loot before accepting.
- Choose the highest available level you can clear consistently, not the highest number visible.
- Prepare the build, recovery items and carrying capacity needed for the full route.
- Complete the bounty and compare its actual reward with the goal that justified the run.
- Raise the level only when the current repeat is controlled enough that the harder version remains efficient.
Available records describe this sequence, but they do not provide a complete, current list of every boss, every unlock prerequisite or every reward table. Trust the entries displayed on your board. If a boss is missing, use the checks below rather than assuming the system has been removed.
Story fights and bounty repeats are separate
A story arena records a progression encounter. A bounty is repeatable Deed content obtained from the board. Those two states should not be mixed. A defeated story boss may no longer be waiting in the original location, while its repeat becomes available through the Guild Hall. Running back to an empty arena is therefore not evidence that Dimraeth lacks boss replay.
The first clear is the important boundary. Material in the available documentation states that a boss becomes available as a repeatable bounty after it has been beaten. It does not say that seeing the boss, reaching the arena or joining another player's kill always completes the same unlock in your own world. Check the story state of the world that owns the board.
If you defeated the encounter in another host's world and cannot find its bounty at home, compare progression before reporting a broken board. Character equipment can travel with a player, while world story state, recruited NPCs and buildings can remain tied to the host world. The evidence does not fully document bounty sharing, so do not promise that a guest clear writes every unlock into the guest's world.
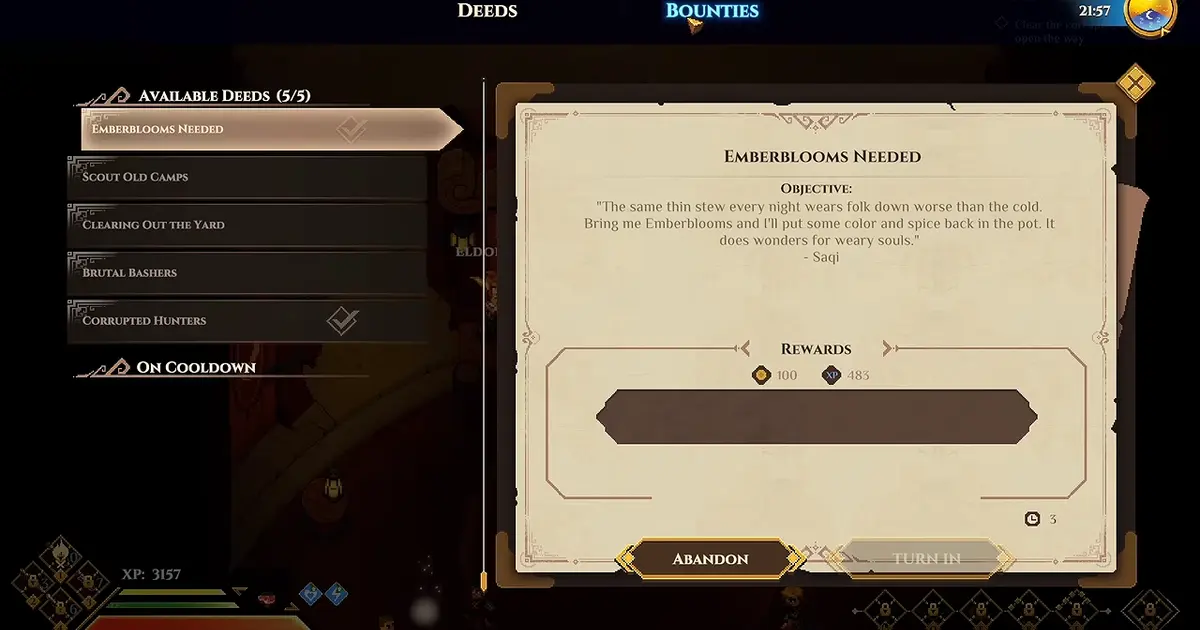
Use the Deeds tab on the Guild Hall board to distinguish replay content from the completed story arena.
The bounty board unlock check
When the expected replay is absent, verify the simplest state first. Confirm that the original boss is marked complete, that you are using the intended world, and that you are inspecting the Guild Hall quest board rather than a different service. Finish any pending turn-in or conversation associated with the first clear before deciding the bounty failed to unlock.
Then clear board-state noise. A recorded creator route warns that taking board quests before the introductory board step can create awkward progression. That is one player's version-scoped observation, not a universal repair instruction. If your board appears out of sequence, inspect the quest log and complete the board introduction already shown by your game. Do not abandon unrelated quests or edit save data on the strength of one report.
Use this order:
| Check | Evidence-safe action |
|---|---|
| First victory | Confirm the story encounter is actually complete |
| Turn-in state | Finish the related conversation or reward handoff shown in the log |
| Board location | Use the Guild Hall quest board and inspect bounties |
| World ownership | Recheck in the world where the story boss was cleared |
| Entry state | Read locked, available and active entries separately |
| Version | Restart after updating only if the game has already saved safely |
No verified Dimraeth record establishes a hidden menu command that forces all bosses to respawn. Avoid importing journal, memory-fragment or menu-rematch systems from other games.
Choose the reward before the difficulty
The efficient decision order is next upgrade, required reward, matching boss, then suitable Deed level. A field guide uses Alpha Teeth as an example: repeating the Alpha Wolf bounty becomes meaningful when those teeth have a defined use. That logic is stronger than farming whichever boss name looks impressive.
Potential Loot is useful because reward packages differ. The evidence includes a field observation in which two board entries display different experience values and different potential-loot sections. Those exact values are not a universal table for every level or version, but they demonstrate why the board should be read before a run.
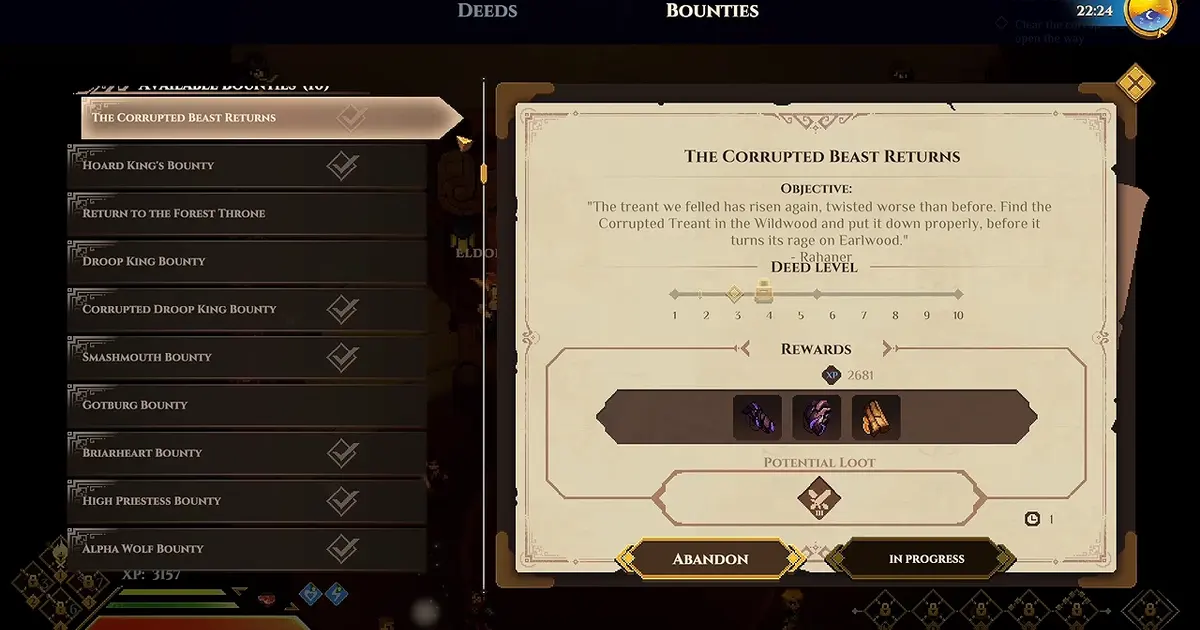
The activity panel puts difficulty selection beside Potential Loot, supporting a reward-first choice rather than an automatic highest-tier run.
Write down what would count as success. If you need one material, stop when that need is met. If you are testing a build, the useful result may be a clean defensive cycle rather than a particular drop. If you are pursuing equipment, identify the set and missing slot before accepting the repeat. A vague goal turns every non-perfect drop into disappointment and encourages unnecessary difficulty increases.
Highest available is not always best
The replay system allows difficulty to rise as higher levels unlock. A quoted creator explanation says that completing a bounty at the highest available difficulty can let the player raise it again. A pre-Early Access developer announcement also described bounties as replayable encounters with scaling difficulty and rewards. Neither statement means every character should immediately select the hardest option.
Measure efficiency across the whole run. Include preparation, travel, normal enemies, the boss, recovery after mistakes and inventory handling. A harder tier can offer better rewards while still being a worse farm if it makes each run much longer or consumes all of the items you are trying to preserve.
Stay at the current level when:
- a single mistake ends an otherwise controlled run;
- normal enemies consume most recovery before the boss;
- the build cannot maintain its resource loop;
- the desired drop already appears in Potential Loot;
- the higher level would require frequent restarts;
- the extra reward has no current use.
Raise the level when the current repeat is predictable, the potential reward serves a real upgrade, and the added risk does not destroy clear consistency.
Boss replay preparation
Prepare for the route that actually exists, not for a clean arena-only rematch imagined from another game. Evidence around equipment-set farming indicates that some desired pieces may come from normal enemies encountered on higher-difficulty mainline boss runs. That means trash packs, carrying weight and recovery can matter to the final value of the replay.
Before accepting, inspect the equipped set bonuses, active spell assignments, consumable charges and free inventory space. Empty heavy crafting materials that do not serve the run. Repair or upgrade only where the change solves a known failure. More preparation is not automatically better if it consumes rare resources for a level you could already clear.
The Dimraeth recipes guide separates crafting, upgrades and charge replenishment. The Concentration guide is the better check when a spell sequence collapses because basic attacks are not restoring the intended resource.
A controlled repeat-farming loop
Use the first repeat at a new level as a scouting run. Note which ordinary encounters are mandatory, how much recovery is consumed, which attacks repeatedly break the build's sequence, and what the board awards on completion. Do not judge the level only by the final boss.
After the clear, make one targeted adjustment. Replace a weak link without breaking an active set bonus. Shorten a dangerous cast sequence. Move a prepared recovery item into the slot you can use under pressure. If the route is already clean, avoid changing it merely because another item has a higher rarity colour.
Then compare three measures:
| Measure | Useful question |
|---|---|
| Reliability | Can the run be cleared repeatedly without a chain of resets? |
| Cost | How many charges, materials and upgrades does one clear consume? |
| Return | Does the displayed and actual loot advance the stated goal? |
Continue only while the answer remains favourable. This prevents a farming session from becoming an expensive test of endurance that no longer serves the character.
Equipment-set farming through repeats
Developer comments connect elite bosses with unique equipment sets. A separate player guide says some bosses have distinct set bonuses that only drop from them. That supports boss targeting, but it does not provide a complete set-to-boss matrix or fixed drop rates.
Open the elite boss equipment drop guide before farming a named set. It explains why normal enemies on the route can matter for certain slots and why a boss kill alone may not complete the package. Keep the board's Potential Loot display central; do not invent a guaranteed item after a fixed number of clears.
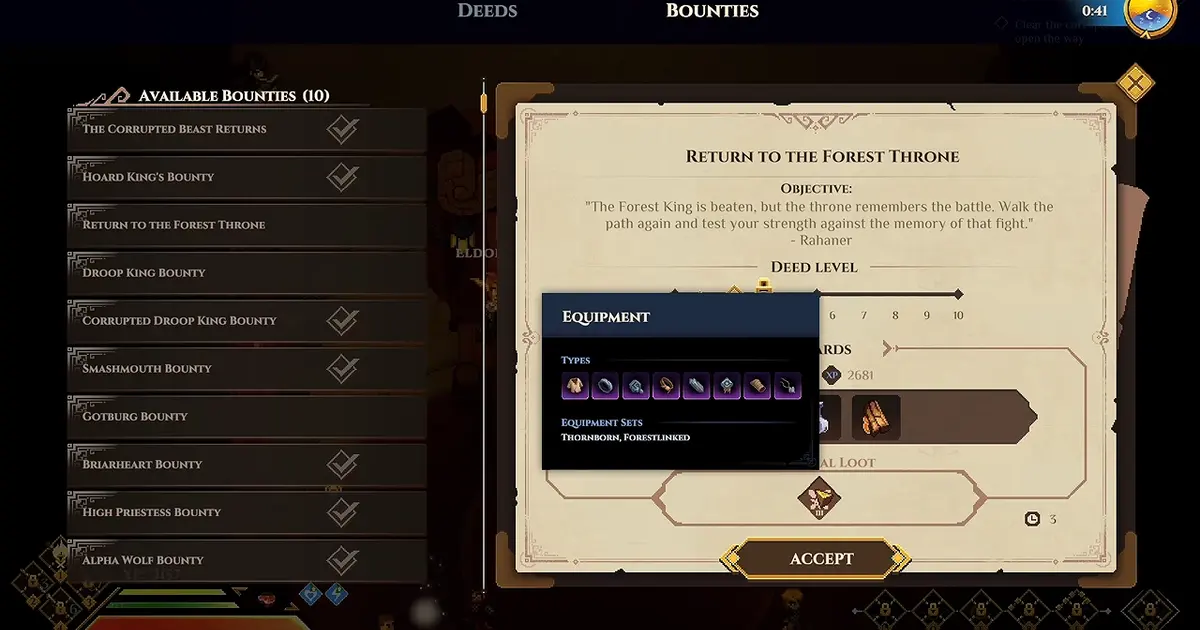
A reward tooltip can expose item and set information before another repeat is accepted.
When a desired piece fails to appear, distinguish a normal random outcome from a wrong source. Several unsuccessful clears do not prove the item is absent, and a single lucky clear does not establish a rate. The evidence provides no pity counter, duplicate protection or universal percentage.
Practice runs and build tests
Boss replay can be valuable even when loot is secondary. A repeatable encounter gives a stable place to test whether a build can sustain its sequence under pressure. Choose one question per run: can the defensive answer be used without exhausting Stamina, can basic attacks restore enough Concentration between casts, or can a set bonus remain active after replacing one item?
Keep the bounty level stable while answering the question. If both difficulty and build change, the outcome becomes hard to interpret. A faster clear could come from lower enemy pressure rather than a better setup, while a slower clear could come from an unfamiliar input sequence rather than weaker gear.
Use the race, class and archetype tree guide when a copied setup contains nodes unavailable to your combination. Use the build overview to compare supported combat directions without pretending one route is mandatory.
Solo and co-op bounty runs
Dimraeth supports multiplayer, but the available documentation does not establish an exact bounty scaling formula. Treat co-op as a coordination option rather than a guaranteed shortcut. A group can cover different jobs, yet more effects and targets can also make the encounter harder to read.
Before starting, agree on the bounty level, the target reward and the treatment of loot. Decide who leads normal packs, who creates space during the boss, and when the group disengages. Do not assume a guest wants the host to raise the difficulty after every clear.
If one player cannot see the same bounty, compare world progression and first-clear history. Run the missing unlock in the relevant world instead of repeatedly accepting a bounty that exists only for another host. Preserve the distinction between personal character progress and world-owned progress until the game itself confirms otherwise.
Missing boss bounty troubleshooting
Use this sequence without skipping ahead:
- Verify the original boss is defeated in the current world's progression.
- Complete any related turn-in shown in the quest log.
- Return to the Guild Hall and inspect the correct board section.
- Check whether the entry is locked, active, completed or simply filtered from view.
- Compare the host world with the world where the first clear happened.
- Save safely, return to the menu and reload after confirming the current build is installed.
- Record the boss name, world, quest state and visible board entries if the problem remains.
Do not substitute a cheat client, memory editor or save manipulation for these checks. No verified repair for a missing bounty requires those tools, and they introduce unnecessary save and multiplayer risk.
Early Access change control
The evidence combines current player observations, creator footage and a pre-Early Access announcement. The broad bounty purpose is consistent across them, but interface labels, unlock timing and rewards may change. Read the live board on every new version and avoid copying old exact values into a permanent farm plan.
A useful replay guide can remain accurate without pretending the system is static: first clear, board bounty, suitable difficulty, deliberate reward target, controlled repeat. Keep that loop, verify the details shown in your build, and stop raising the level when the run no longer advances the goal efficiently.