
There is not enough boss-specific evidence to publish a complete Corrupted Treant counter or move list. Surviving footage confirms that the creature appeared in playable boss material, while a separate player report describes a broader Wildwood difficulty jump around treants, dryads and mixed enemy groups. That mixed-enemy report is context, not proof of this boss's arena, attacks or adds. Use the controlled observation method below until those details can be verified in the current build.
The first goal of a new attempt is not the kill. It is to identify why the previous attempt ended. A character that cannot survive one observed hit needs a different preparation check from a character that survives but never finds time to attack. Record only what the current encounter actually shows; do not import enemies, mechanics or timings from a different Wildwood fight.
Dimraeth Corrupted Treant quick plan
- Empty unnecessary weight and prepare the combat items you actually use.
- Confirm that your active spells, basic attacks and resource-recovery loop work before entering.
- Use the opening seconds to watch the boss rather than committing to a long attack sequence.
- Reposition within the visible encounter space and keep the camera readable.
- Punish only after an action has clearly finished.
- End your attack sequence early enough to defend the next action.
- If the attempt fails, record the visible cause instead of assigning it to an unverified mechanic.
This checklist is deliberately build-neutral. Available material shows that Dimraeth supports substantially different race, class, spell and equipment combinations. Advice that assumes every player has the same dodge, block, spell bar or status package would be misleading. Apply the structure to the actions your character can actually perform.
The evidence boundary for this boss
The Corrupted Treant is documented as a Dimraeth monster, and surviving footage confirms that it has appeared in playable boss material. The available transcript, however, contains almost no usable commentary about individual attacks. unrelated online pages also include pages about unrelated treants and unrelated games. Those results are not a basis for declaring that this boss is weak to fire, vulnerable at a named limb, resistant to a damage school, or guaranteed to drop a particular item.
That boundary matters because confident but unsupported counters waste more time than a careful observation attempt. If your current tooltip, codex or combat feedback shows a resistance or interaction, use the information visible in your installed version. Do not assume an old demo animation or another player's build proves the same rule for Early Access.
| Supported conclusion | Still unverified here |
|---|---|
| The Corrupted Treant appeared in playable boss material | A complete Corrupted Treant move list |
| Build quality, equipment readiness and learning attack patterns affect difficult boss attempts | Exact damage weaknesses or immunities |
| A separate Wildwood report describes mixed-enemy pressure, but not this boss arena | A guaranteed minimum level, required class or add phase |
| Returning stronger can make a previously difficult encounter manageable | Exact health, stagger or reward values |
Do not transfer Wildwood reports to the boss
One solo report describes the deeper Wildwood as difficult when dryads, wolves and treants appear together. The player calls out being surrounded, taking many small hits, losing track of defensive timing in the visual noise, and seeing encounter waves reset after death. None of that proves that the Corrupted Treant fight contains the same composition, an add phase or the same reset behaviour.
Keep the two observations separate in your own notes. If the current boss encounter visibly contains another enemy, record its name, spawn timing and whether it returns after a reset. If it does not, diagnose the fight only from the boss actions on screen. This distinction prevents a general region complaint from becoming a false boss mechanic.
No verified arena boundary is currently documented. Explore the usable space during a low-commitment attempt, avoid backing into an unseen edge and note any actual reset point you observe. Do not treat that observation as a universal coordinate until it can be reproduced in the current Early Access build.
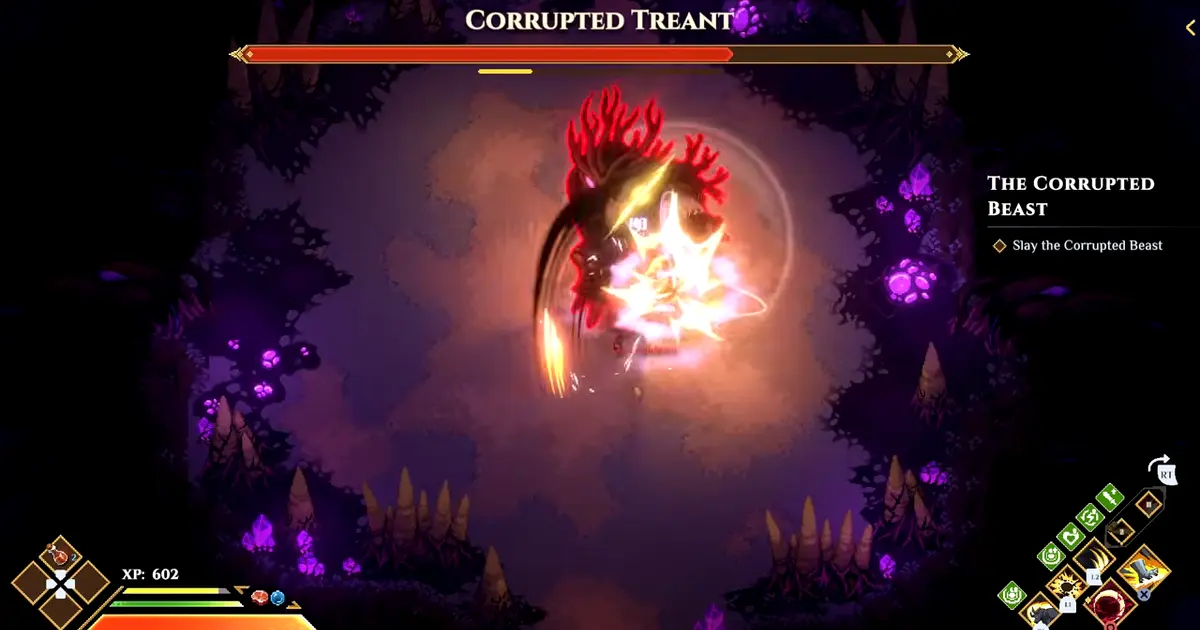
The recorded encounter confirms the Corrupted Treant name and combat context without establishing a hidden weakness or complete move list.
Readability comes before damage
The most useful improvement for a chaotic fight may be a clearer screen. Keep the boss in view and avoid fighting directly against scenery that hides the lower part of an animation. When effects overlap, stop adding more effects for a moment and watch the current action. A shorter sequence that preserves visibility is often more informative than a full rotation that covers the warning you needed to see.
Use distinct jobs for each part of the attempt. Movement creates a safe angle. Defence survives an incoming action. Resource recovery prepares the next meaningful cast. Damage uses the opening created by those earlier steps. When all four jobs are compressed into one frantic input sequence, it becomes difficult to know which part failed.
The Dimraeth movement guide covers encumbrance and control checks that can make a character feel unexpectedly slow. Resolve those issues before deciding the boss has impossible tracking. The Concentration recovery guide separates basic-attack recovery from spells that merely look like weapon attacks.
Build a safe attack cycle
A safe cycle has three phases: observe, answer, punish. During observation, maintain enough space to see the action begin. During the answer, block, dodge or reposition using the defence available to your character. During the punish, use an attack sequence short enough that you can return to observation before the next action.
Do not begin by trying to discover the longest possible combo. Discover the shortest reliable punish first. One basic hit, one quick spell or one status application is enough to test an opening. If the boss consistently cannot retaliate before that action ends, add another input on a later attempt. If it can, return to the shorter version.
This method also exposes false openings. If you are hit at the same point after several apparent staggers, the visual state may not grant as much time as you assumed. If a long spell keeps being interrupted, the problem may be cast duration rather than low damage. If a status approach works only when every effect is already active, reserve the setup for a genuinely safe interval.
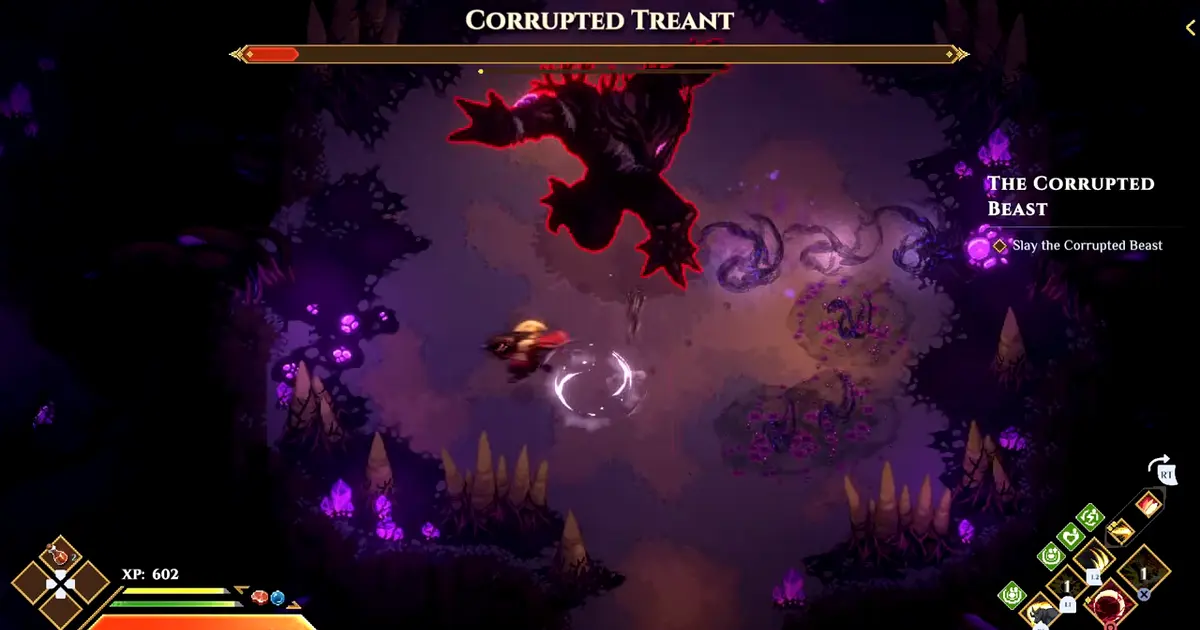
This airborne action is a useful example of why an attempt should record visible wind-up and recovery instead of guessing timing from a still frame.
Resource failures that look like boss difficulty
Running out of a combat resource changes the fight even when the boss has done nothing new. A planned defensive or damaging action can fail, leaving the player stationary or committed to the wrong input. Before the encounter, use a harmless enemy to verify how your basic attacks restore resources and which active actions consume them.
During the boss, do not spend the entire bar simply because an opening exists. Keep enough flexibility for the next job in the cycle. A creator discussing Dimraeth's difficult fights emphasises that levels and gear matter, but also that parrying, dodging, strategic movement and learning patterns can turn a hard encounter into a manageable one. Treat that as player advice, not as proof that one defensive technique is mandatory.
If an intended spell does not appear or cannot be cast, leave the boss arena and fix the loadout. The spell-equipping guide distinguishes recipe discovery, crafting, learning, attribute requirements and active assignment. Repeating a boss attempt cannot repair a spell that was never successfully prepared.
Equipment readiness without invented thresholds
There is no verified gear-score requirement for the Corrupted Treant in the available documentation. That does not make equipment irrelevant. It means the readiness check must use comparisons you can observe rather than a made-up number.
Review the last several encounters. If ordinary enemies in the same progression area take extremely long to defeat, the boss is probably not the only problem. If one normal hit removes a large part of your health, inspect equipped pieces, upgrades and the attributes supporting your build. If your damage is acceptable but every mistake becomes fatal, favour consistency while learning instead of chasing a fragile bonus you cannot maintain.
Set bonuses deserve a complete comparison. Replacing one piece can remove an active bonus even when the new item's individual stats look better. The Dimraeth rune-set bonus guide explains how to compare the functioning package with the proposed replacement. Change one variable at a time so that the next attempt tells you something.

Use the live equipment panel for readiness checks; this example does not set a Corrupted Treant gear requirement.
Solo attempts and co-op attempts
The available documentation includes players describing solo difficulty, while Dimraeth itself supports multiplayer. That does not prove a particular health-scaling rule for this boss. Do not promise that adding a player automatically makes the encounter easier, and do not assume a solo technique transfers unchanged when another character is drawing attention.
For solo play, prioritise a cycle you can repeat without external support. Do not build the plan around a teammate providing recovery, control or revival. For co-op, agree on simple responsibilities before engaging: who enters first, when players disengage and who preserves resources for recovery. Clear roles reduce visual noise and prevent everyone from committing at the same time.
World progression can also differ between hosts. If the group sees different services, boards or preparation options after leaving the fight, check whose world owns the relevant progression. Do not diagnose a missing service as a boss bug until that difference has been ruled out.
Death review that produces a useful change
After a loss, resist changing the class, every piece of gear and the entire spell bar at once. A large rebuild destroys the comparison with the previous attempt. Instead, name the exact event that ended the run and choose one response.
| Failure observed | Next controlled change |
|---|---|
| Damage came from an unseen source | Review the recording and identify the source before changing the build |
| Hit during a long attack | Shorten the punish window |
| Defensive input unavailable | Reserve the required resource and avoid overcommitting |
| Movement feels slow throughout | Check carrying weight and movement state before returning |
| Damage remains low against all enemies | Review gear, upgrades and build support outside the arena |
| A spell is missing or inert | Verify the recipe, book, requirements and active slot |
| The screen becomes unreadable | Reposition and reduce overlapping effects during observation |
Use the same opening for several tests when possible. If the result changes only after your adjustment, you have learned something. If it changes randomly, collect more observations before declaring a rule.
Claims to ignore until verified
Do not build an attempt around an exact weakness copied from an unverified page. Do not assume the demo fight has the same tuning, rewards or attack timing as the current Early Access build. Do not accept a level requirement merely because one player won at that level. Do not treat a successful fire build as evidence that fire is a coded vulnerability. A build can succeed because its full loop is strong, not because one element receives a hidden multiplier.
The same caution applies to no-hit videos. A completed performance proves that the demonstrated player and build survived that recording. Without readable inputs, gear and version information, it does not prove the safest route for another character. Use such footage to observe spacing and recovery, not to invent missing statistics.
Corrupted Treant retry checklist
Before another attempt, confirm the following:
- the character is not slowed by unnecessary carried materials;
- the intended spells are learned, assigned and affordable;
- the chosen basic attack can support the resource loop;
- prepared recovery items have the expected charges;
- the camera and effect load let you see the boss action clearly;
- one short punish has been identified;
- the escape direction stays inside the encounter area;
- the attempt has one learning goal rather than five simultaneous experiments.
Then enter and run the plan. Observe first, answer the action, punish briefly and reset your position. If the boss still feels too hard, leave with a named problem instead of a vague conclusion. Improving one named problem is how a fight moves from chaotic to learnable.
Early Access limits
Dimraeth is in Early Access, so encounter tuning and surrounding systems may change. The available documentation does not establish the exact build number used by every player report or video. Treat any timing learned from older footage as a starting observation and trust the behaviour visible in your current game.
This page intentionally omits exact health, resistance, drop-rate and attack-frame claims. Those details would be useful only if they were verified. For repeat attempts after a first clear, continue to the Dimraeth boss replay guide. For the relationship between elite bosses and named equipment, use the elite equipment drop guide.